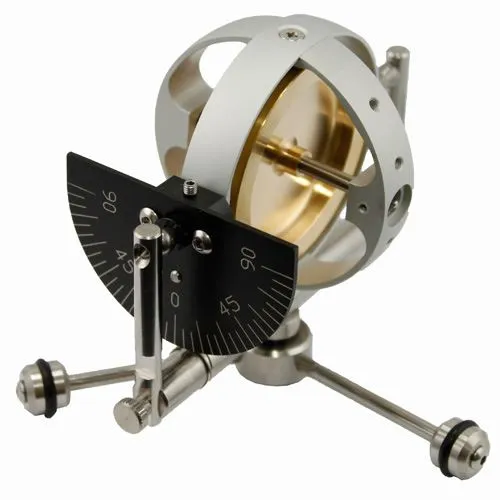
It can also be used in physics lessons showing the gyroscopic couple. Pull the gauge up and let go. This time the spring provides the torque on the gyroscope. The gyroscope will now precess around until the energy in the spring can no longer be utilised.
Requires the Super Precision Gyroscope + gimbals add-on kit.
How to put the kit together
- Attach the hub/boss to the back of the gauge (looks very much like a protractor) using the supplied screws. You can tighten them up using the Alan/hex key that comes with the gyroscope.
- Screw in the grub screw slightly into the top of the hub/boss. Note the grub screw is not supplied with the rate kit, it is supplied with the gimbals kit. Hint: you may find it in the counter weight.
- Build the gimbals kit so it is roughly like photo. Leave the closest vertical ‘arm’ off for the time being.
- Attach the one end of spring to the gauge/hub/boss. Slide the other end over the ‘T’ shape piece of the gimbals.
- Place the ball end into the gauge/hub/boss and tighten up.
- The tricky bit is attaching the upright with the gyroscope in place. The spring will be pulling everything down. I usually find it takes a few attempts.
- Tighten up the ball end to the gyroscope then tighten up grub screw on the hub/boss. Check everything else is tight.
- Spin the gyroscope up and move around to see what happens. You will notice the spring always pulls the gyroscope back into position when the gyroscope is not moved around. But when it is moved around the gauge shows the rate of change. E.g. how quickly it is being moved.


